Galette de Rois – King Cake

Serves 8

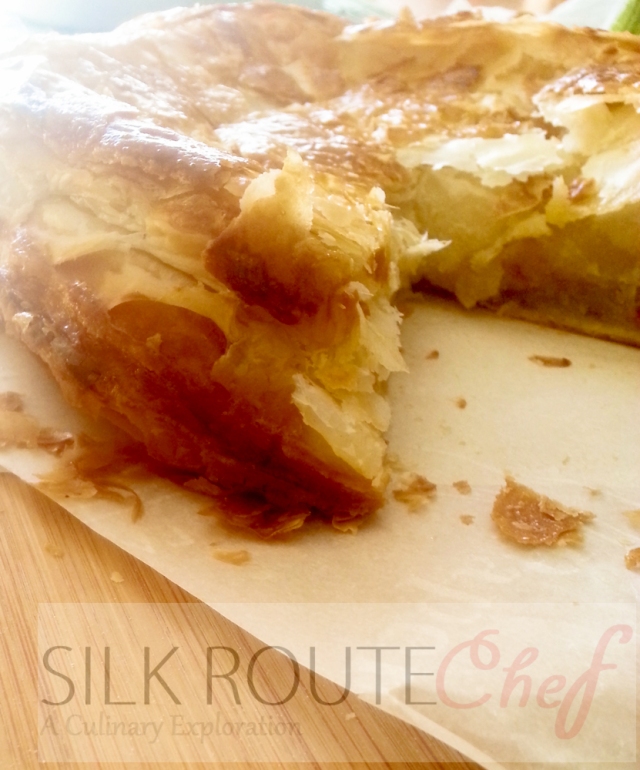
French pastries are famous the world over and this cake is a great example why.  It’s one of the most unique and delicious pastries I’ve had.  The taste is not comparable to anything else!   Golden, flakey puff pastry is filled with an amazing sweetened almond cream that’ll blow your mind.  Once you have a bite you’ll want to eat the whole thing yourself.  Galette de rois is usually served during Christmas with a feve or prize hidden inside.  Whoever finds the feve would be king for a day and hence the name.  Whether you make it for Christmas or for a party or just to enjoy at home, try this recipe.  For all its deliciousness it’s very easy and simple to make if you use store-bought puff pastry.  It’s much simpler than making it yourself and looks and tastes much better.  Let’s get started.

20140420_124138-220140420_123932-2

Galette de Rois – Recipe

Ingredients

For Almond Cream Filling:

  • 1 cup almond flour
  • ¼ to ½ cup sugar (according to taste)
  • 3 Tbsp. butter, at room temperature
  • ½ tsp. vanilla extract
  • 1 egg
  • Zest of 1 small orange or lemon (optional)

For Pastry:

  • 1 package puff pastry (a package of two)
  • 1 egg, beaten

Instructions

  1. Preheat oven to 425 degrees and cover a cookie sheet or baking tray with parchment paper and brush with a little bit of the softened butter and set aside.
  2. Combine almond flour and sugar, add butter and orange or lemon zest (if using) and blend together.
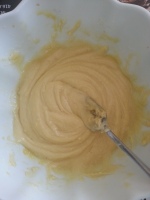
  3. Add vanilla and egg and mix until well combined.  Cover and chill until puff pastry is prepared.
  4. To prepare the puff pastry, roll out one half of the puff pastry and trace and cut a 9” circle using a plate or cake pan.
  5. Lay it on the prepared baking tray and prick several times with a fork.
  6. Spoon almond filling on top making sure to leave bare a 1” border around the edge.
  7. Roll out second half of the puff pastry the same way as the first and cut out another 9” circle.
  8. Brush the bare edge of the first puff pastry with the beaten egg and lay the second one carefully on top pressing down around the edges to seal the two together.  Press down with your finger and crimp the sealed edge for added protection.
  9. Brush the top with egg wash and score a zig zag pattern with the tip of a knife if you like ensuring you do not score all the way down to the filling.  Cut a few slits strategically around the top as well in order to vent the steam.
  10. Place in the oven and bake for 25 – 30 minutes or until pastry puffs up and is golden brown on top.  You may have to slit the pastry a few times if it puffs up unevenly to release steam trapped underneath the unevenly risen places.

Preparing the almond cream filling:

20140420_112607   20140420_112938   20140420_113029   20140420_113243

Preparing the puff pastry:

20140420_114935   20140420_115623   20140420_115701   20140420_115955

Eggwash and scoring the pastry:

20140420_120144   20140420_120309

20140420_124143-2 20140420_123948-220140420_124638-2

To serve, let cool for at least 15 minutes, slice into 8 and serve with strong coffee or tea.  This is so good I can’t stop eating it.

Eggless Chocolate Malt (Milo) Cupcakes (The Best)

Serves 24

These cupcakes taste so balanced, so nuanced and so amazingly delicious and satisfying that you’ll never even be able to tell that these are eggless.  That’s what makes this the best.  It’s a malted milkshake in cupcake form.  The malted milk powder in combination with the cocoa powder make this recipe very robust in flavour, but still remains so moist and soft and delicate in texture. It’s the perfect combination of taste and texture and all in small delectable packages!  Let’s get started.

Eggless Chocolate Malt (Milo) Cupcakes

Eggless Chocolate Malt (Milo) Cupcakes – Recipe

Adapted from Chow

Ingredients

  • 2 cups malted milk powder, sifted (use chocolate malt powder like Milo)
  • 1 2/3 cups all-purpose flour, sifted
  • 2 Tbsp. cocoa powder
  • 1 ½ tsp. baking soda
  • ½ tsp. salt
  • 1 1/3 cups sugar
  • 3/4 cup yogurt, plain
  • 2/3 cup vegetable oil
  • 2 tsp. vanilla extract
  • 1 cup milk
  • 1 batch condensed milk buttercream, to frost (or other sweet icing of choice)

Instructions

  1. Preheat oven to 325 degrees and line two 12 cup muffin tins with cupcake liners.
  2. Add first 5 ingredients into bowl and mix until well combined and free of any lumps.  Set aside.
  3. In the bowl of a stand mixer (using paddle attachment) or large bowl if using an egg beater, add sugar, yogurt, oil and vanilla extract and beat on low until well combined and smooth.
  4. Add a third of the flour mixture and third of the milk and continue to beat on low until well combined.  Repeat until all the flour mixture and milk are used up.
  5. Increase speed to medium and beat until smooth, 2 minutes.
  6. Ladle batter into each cupcake liner until about 2/3 full.  Transfer to preheated oven and bake for 25 minutes or until a toothpick inserted into the centre of a cupcake comes out clean.

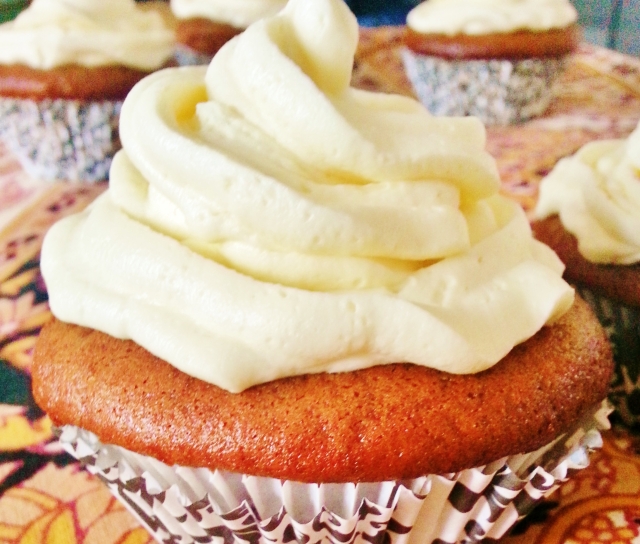
Eggless Chocolate Malt (Milo) Cupcakes 2Eggless Chocolate Malt (Milo) Cupcakes 4

To serve, let cupcakes cool and then remove them from muffin tin.  Frost with condensed milk buttercream and enjoy.   Easy, quick, eggless chocolate malt (Milo) cupcakes are ready.  You won’t be able to resist these little tasty treats.

Condensed Milk Buttercream Frosting

Serves 10 (cake) or serves 24 (cupcakes)

This recipe makes 5 cups of frosting, which will generously frost a 10” wide, 4” tall round cake or 24 cupcakes.  That is, if you don’t eat it all before you can get it onto the cake!  Buttercream is usually the staple frosting for many bakers.  It’s sweet, rich and creamy and is one of the most perfect accompaniments to any type of cake.  This condensed milk version takes it to the next level of delicious.  I have to try very hard not to lick it right off the whisk.  Let’s get started.

Condensed Milk Buttercream Frosting

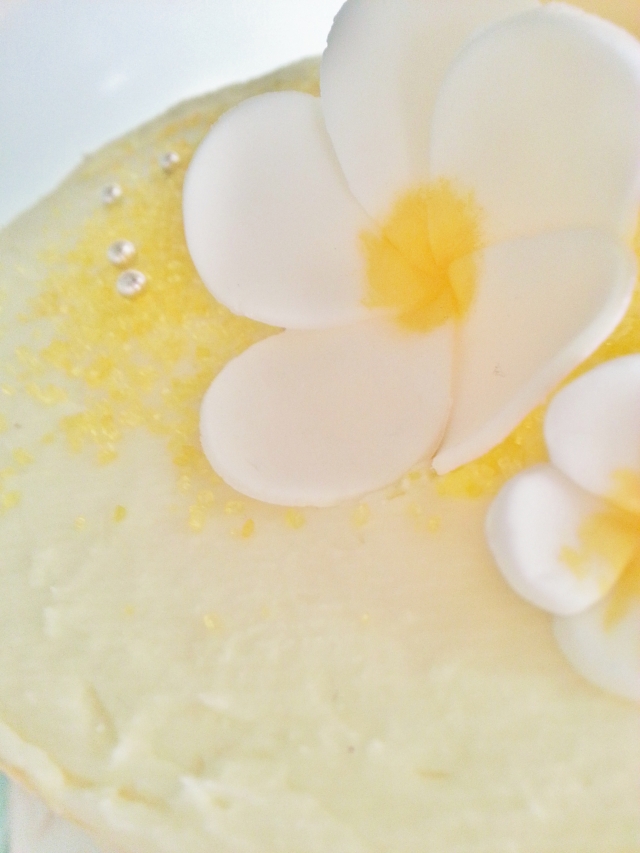
Chocolate cake covered in condensed milk buttercream frosting, speckled in gold and topped with plumerias.

Condensed Milk Buttercream Frosting – Recipe

Ingredients

  • 2 cups unsalted butter, slightly colder than room temperature
  • 4 cups confectioners (powdered) sugar, plus 1 cup in case butter is too soft
  • 2 tsp. clear vanilla extract*
  • ¼ cup condensed milk

*I use clear vanilla extract so it doesn’t alter the colour.  If that’s not a consideration then use regular vanilla extract.

Instructions

  1. Beat butter with paddle attachment of mixer or egg beater until pliable, 1 to 2 minutes.
  2. Keeping the mixer or egg beater on low speed, sift in powdered sugar a little bit at a time until well incorporated.
  3. Turn up speed to medium and add vanilla extract and condensed milk and beat until well blended and free of lumps.  Add more sugar if buttercream is too soft or more condensed milk if too stiff until desired spreadable consistency is reached.
Condensed Milk Buttercream Frosting 2

Chocolate cake covered in condensed milk buttercream frosting, speckled in gold and topped with plumerias.

Condensed Milk Buttercream Frosting 4

Chocolate cake covered in condensed milk buttercream frosting, speckled in gold and topped with plumerias.

This is my favourite buttercream and goes amazingly well with almost any kind of cake including plain vanilla, chocolate, malt and eggless spiced cake.

Information:

  1. I prefer this without salt, but if you find the frosting too sweet, add a little bit of salt until desired taste is achieved.
  2. Butter should be slightly cool, but not cold in order to make the prefect buttercream frosting.  If your butter is at room temperature, put in the freezer for a couple of minutes before using.
  3. If your butter is too cold, put half of it in the microwave and heat it for a few seconds at a time until pliable, but not runny.
  4. If your butter is too soft, you’ll need to add more powdered sugar to get the right consistency.  Keep another cup of powdered sugar on hand just in case.
  5. I find it best to sift the powdered sugar right into the butter instead of sifting it beforehand as you could create inconsistences in the transfer process.
  6. Keep buttercream slightly stiff for spreading on cakes and slightly soft for piping on cupcakes.

Best Vanilla Cake with Real Cream Frosting

Serves 8

I’m totally excited to be sharing this recipe with you.  This is my secret recipe – well it’s actually Riccardo’s recipe – for the best tasting cake ever and that’s not an exaggeration!  Birthdays and other special occasions all call for cake, which for most people means a trip to the bakery or supermarket.  You may have picked up a real cream cake at some point – usually one of the most expensive on display – and completely fell in love with the rich taste.  Yep, this is the story of many a person.

Here’s how you can make your very own vanilla cake with real cream frosting topped with real shaved white chocolate: just like at gourmet bakeries.  It’s so delectably delicious, smooth, rich and looks spectacular that no one would believe that you made it yourself.  It also contains no butter and the decoration is fool proof.  The art is in the mess, after all.  Make your very own best vanilla cake with real cream frosting in just 12 easy steps.

Only thing to keep in mind is that to get the best results, you’ll need two evenings to work on this or a morning and evening if you’re going to be home.  Let’s get started.

IMG_20130316_083347

Best Vanilla Cake with Real Cream Frosting – Recipe

Ingredients

Vanilla Cake:

  • 3 cups pastry flour
  • 1 Tbsp. baking powder
  • ½ tsp. salt
  • 4 eggs
  • 1 ½ to 2 cups sugar
  • 1 Tbsp. real vanilla extract
  • ¾ cup canola oil
  • 1 cup milk

Real Cream Filling/Frosting:

  • ½ small tub cream cheese spread
  • 2 cups heavy cream
  • ¼ to ½ cup sugar, depending on how sweet you want it
  • 2 tsp. real vanilla extract

Assembly:

  • 2 Tbsp. raspberry jam (optional)
  • 1 small white chocolate block, good quality*
  • 1 small dark chocolate block, good quality

*To shave chocolate, you can use a potato peeler at a 45 degree angle and scrape the block of chocolate and catch the shavings below in a bowl or directly on the cake.

Instructions

  1. Preheat oven to 350 degrees. Grease two 8 inch cake pans with butter or oil.  Set aside.
  2. In a bowl, sieve in all dry ingredients – except the sugar – and mix together.  Set aside.
  3. In a separate large bowl, cream together eggs, sugar and vanilla with an electric mixer while slowly drizzling in the oil, about 10 minutes.  Don’t skim out on the time, it’ll be worth it.
  4. Turn mixer to low and alternately add in the dry ingredients and milk a little at a time until well combined and mixture is smooth.
  5. Pour into prepared pans and bake for 50 – 55 minutes or until a toothpick inserted comes out clean.  Let cool slightly, remove from pan and let it cool completely.  Keep in the fridge for up to a day until ready to use.  This will make it easier to frost the cake.
  6. When ready, chill large bowl and your electric mixer attachments in the freezer for 10 minutes; you want the frosting to stay cool for as long as possible.  Once chill, whip cream cheese spread until more pliable and smooth.  With electric mixer on medium, add sugar and vanilla and whisk until smooth and glossy.  Add in cream slowly and continue to whisk until mixture thickens.  Turn up speed to high if you have to and continue to whip until mixture holds stiff peaks. To test, drag a spoon through mixture and see if a sturdy ‘peak’ appears in the mixture.  Spoon into a piping bag and use immediately.
  7. To assemble, even out the top of each cake with a knife and arrange one cake slab on a parchment lined turn table or cake board at eye level.
  8. Pipe about ½ cup of the real whipped cream into a small bowl, combine with raspberry jam and spread evenly on top of the cake with a spatula.  If you’re not using raspberry jam, pipe directly onto the cake.  It doesn’t have to be perfect.  Place second cake slab on top and adjust until both slabs are evenly aligned.
  9. Spread a thin coat of the whipped cream all over the cake and let it set in the fridge, 15 minutes.  This is called a crumb coat and it will help seal all the crumbs so frosting appears even and free of lumps and crumbs.
  10. Once set, frost cake evenly with the rest of the whipped cream.  Use a spatula or flat edge of a knife to even it out.  Don’t worry if it’s not perfect at this stage.
  11. Shave white chocolate onto cake until completely covered.  Make sure to get the side completely covered as well.  You may have to finagle the cake a little in order to achieve this.  The frosting should not show through. Keep in the fridge until ready to serve.

When ready to serve, shave a little dark chocolate on top, or add dark chocolate curls and voila, you have a gourmet quality vanilla cake with real cream frosting to impress everyone with.  At this point, you can also pile raspberries in the centre and add more dark chocolate shavings or curls on top.

To add height or name and message, melt chocolate in the microwave and pipe it on a parchment paper.  Let it dry completely and then peel away parchment paper and stick it into the cake.  Do this gently so you don’t break it; it’ll be fragile.  You can also use premade chocolate words or store-bought messages to make it easier and faster.  However you decide to finish it, sit it on a cake stand and let the ‘I can’t believe you made this’s and ‘this tastes absolutely amazing’s begin.